A guide to Live auction in Auction IO
The spirit to win the product that is being auctioned has the bidders compete in a race that is time-ridden.
Live Auction :
Live Auction is an auction setup without an end date, where the seller can control the auction and the bidding, and can also choose to close the auction at his will.
AUCTION SETUP: Seller’s Panel
The sellers or auctioneers, who hold the inventory, can create a live auction by filling the basic auction details, such as date & time, description, and a selection of up to 1250 unique items to sell.
To create the Auction:
My Auctioneer -> Auction Setup
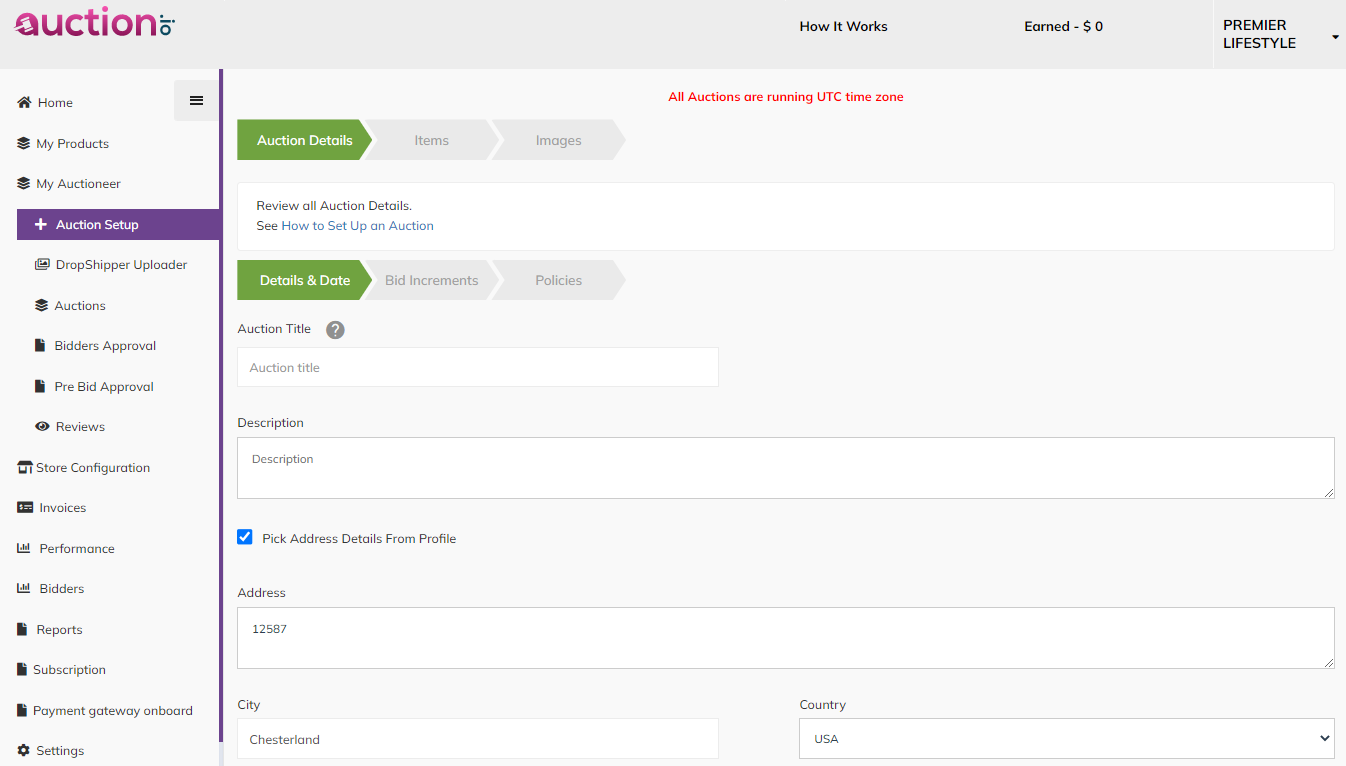
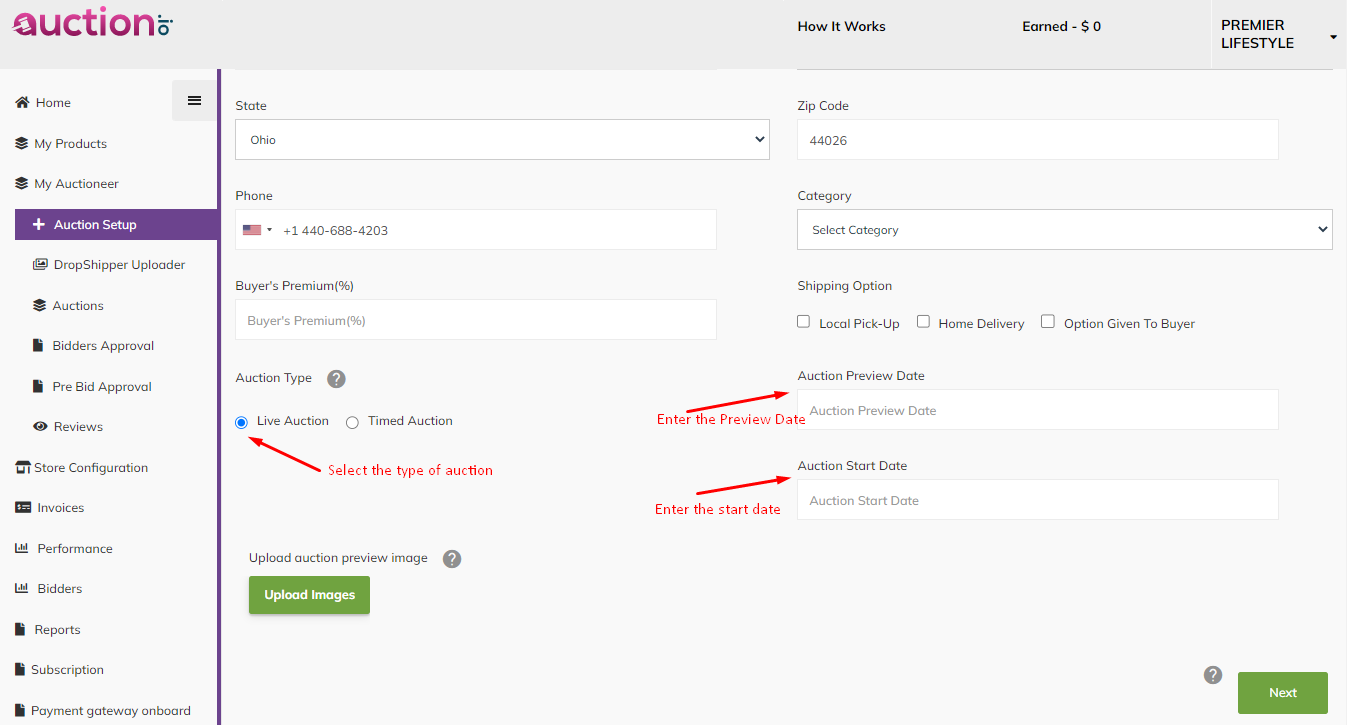
- The seller needs to select the auction type as ‘Live Auction’.
- The seller can advertise / announce his upcoming auction by entering the ‘Auction Preview Date’
- The live auction will begin based on the date that is mentioned in the ‘Auction Start Date’.
- The seller can then select the category of the auction, shipping option, and can upload an auction preview image.
- The seller can choose to set up bid increments.
- The seller can also enter the auction policies in Payments, Shipping, Pick-up, and Terms & Conditions.
- The seller can then add items one-by-one, or use a file template to upload all items at once.
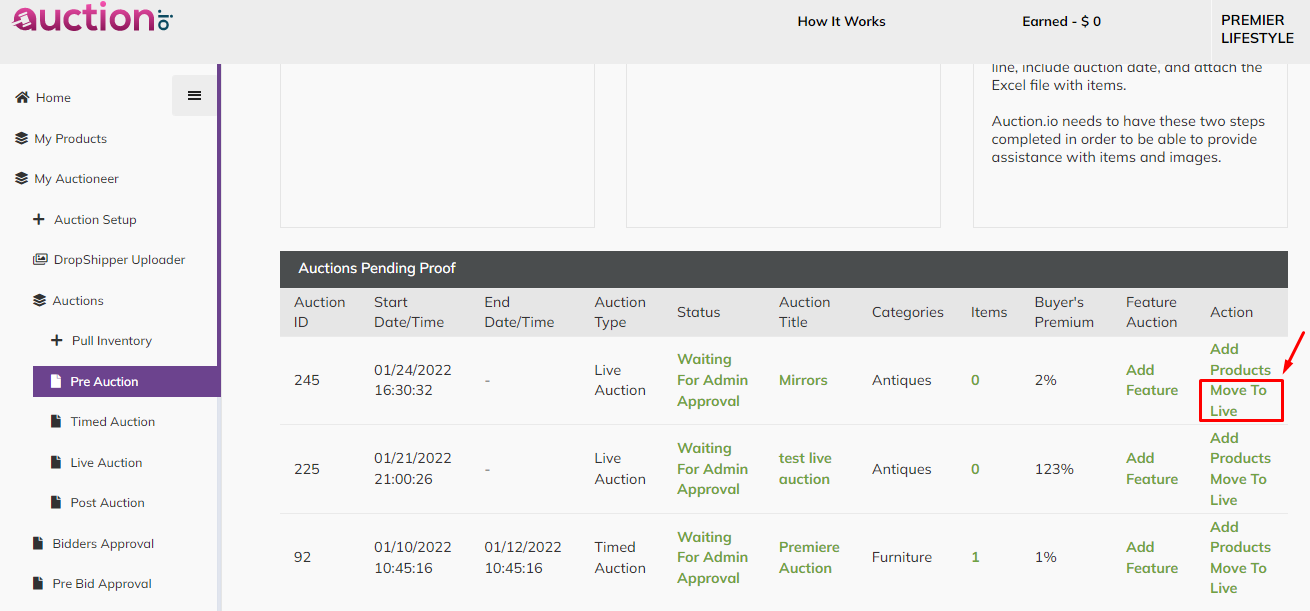
- Move to Live
- Pull Inventory
The auction should be made live by clicking on the link ‘Move to live’ on the following page”:
Auctions -> Pre Auction
 2. Pull Inventory
The seller then needs to ‘Pull Inventory’ by clicking on the ‘Add’ button on the following page:
Store configurations -> Pull Inventory
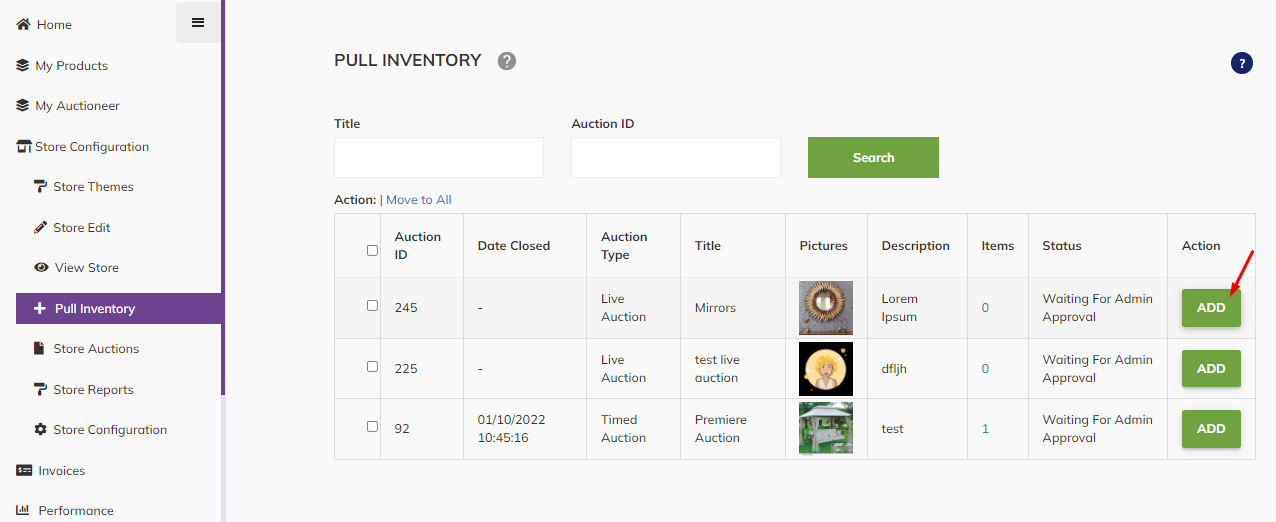
Now the auction created by the seller is live.
BUYER’S PROFILE:
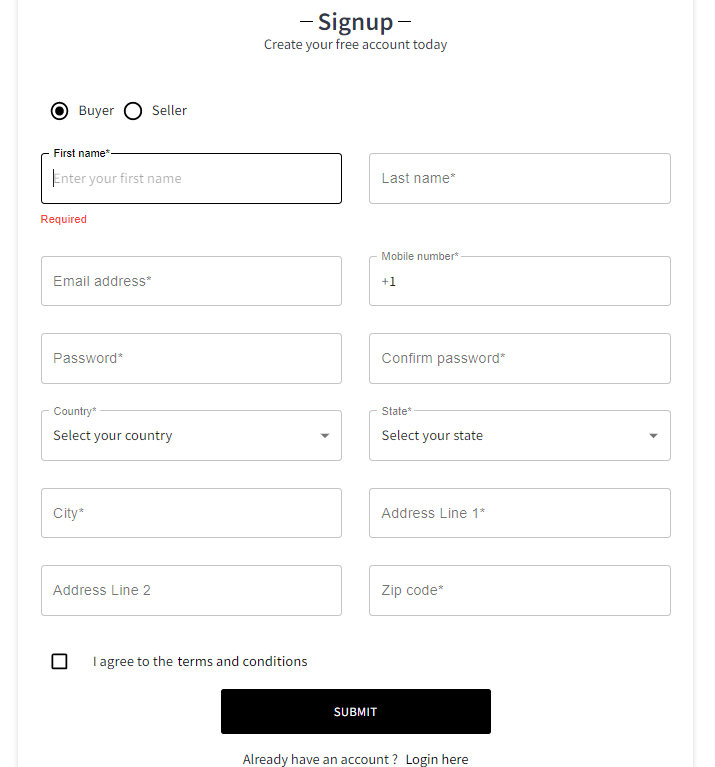
Every user who wishes to participate in the bidding needs to first have a buyer’s profile.
The profile can be created by signing up as a buyer.
LIVE AUCTION FLOW … Now the story begins…
The buyer first visits the ‘Auctions’ page.
If the buyer wishes to bid for the product, a request needs to be sent to the seller.
So the buyer clicks on the ‘Register for auction’ button, and the request is sent to the seller.
————
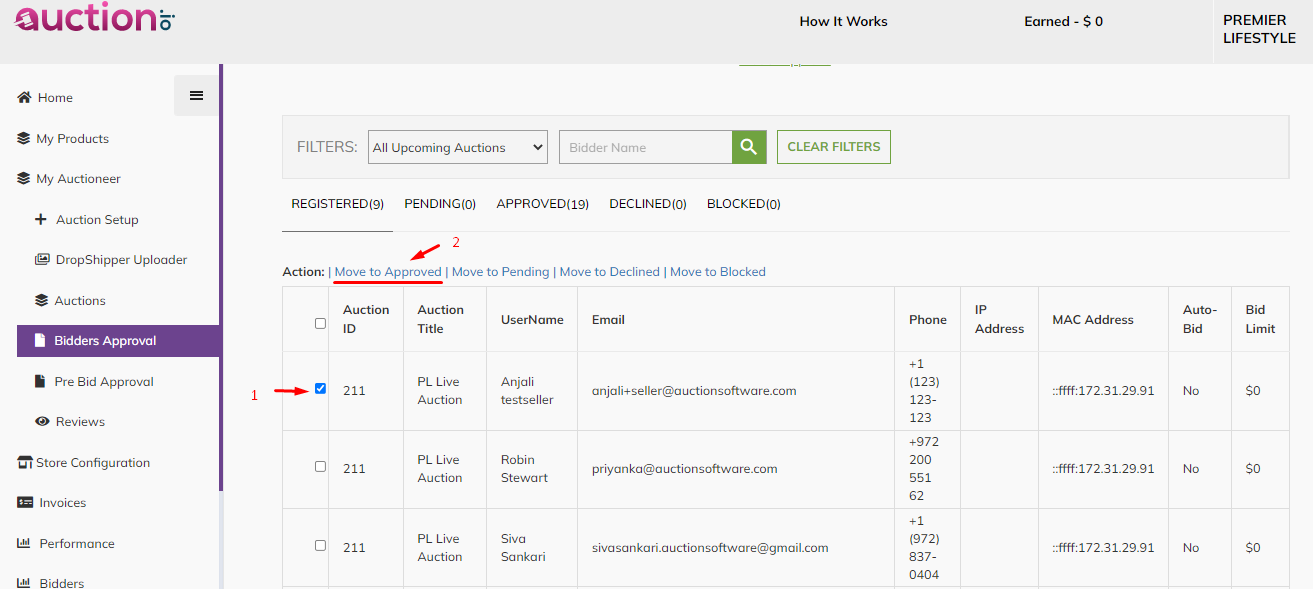
The seller can approve the buyer’s request by the following steps in the panel:
My Auctioneer -> Bidders Approval
Selects the buyer, and clicks on ‘Move to Approved’
————
The buyer can now click on the ‘Enter Live Auction’ button on the preferred auction page, and can go to the bid room, and can now bid on the product.
Once a bid is placed, the bid will remain pending until it is approved by the seller
————
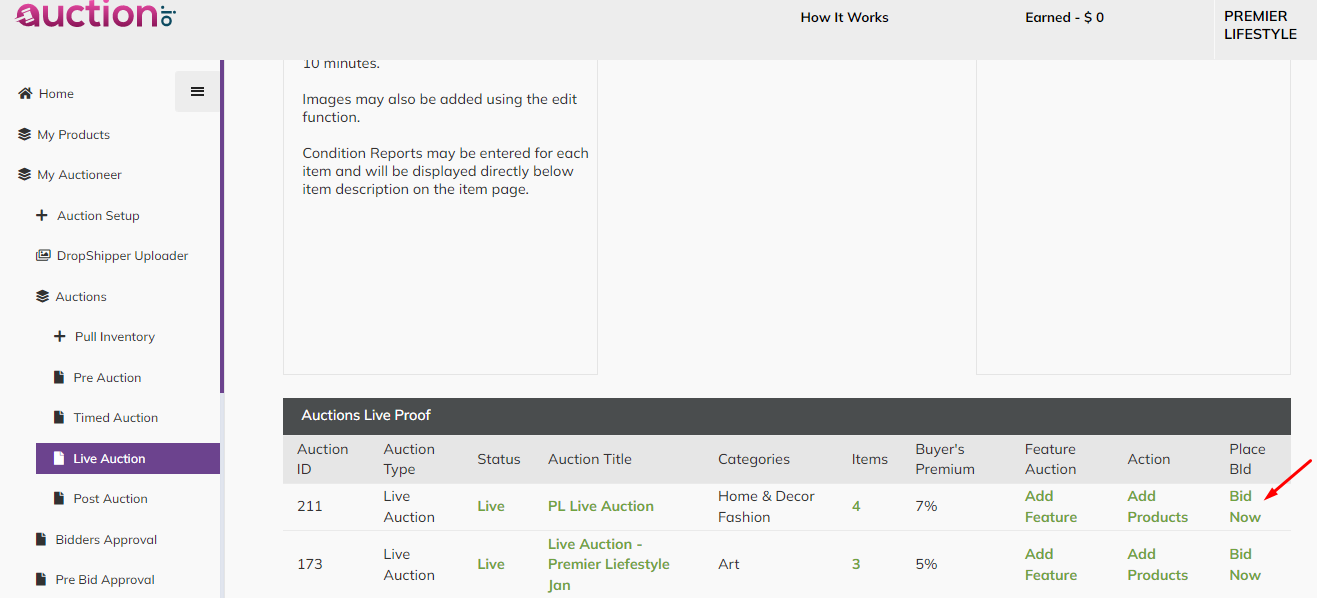
The seller need to approve the buyer’s bid by the following steps:
My Auctioneer -> Auctions -> Live Auction
Click on the link ‘Bid Now’ for the particular auction.
————
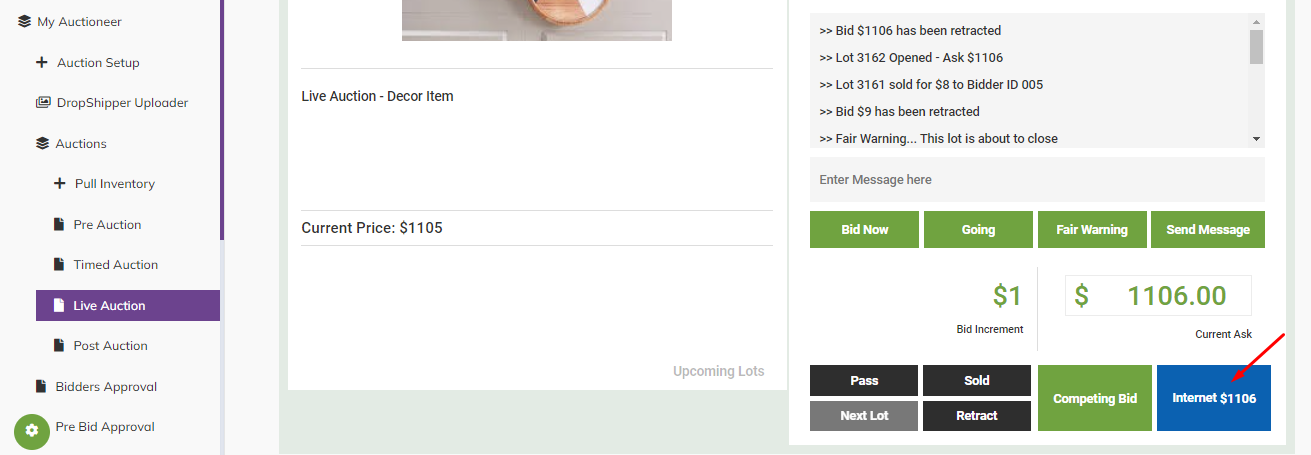
The bid placed by the buyer will be displayed on a button as ‘Internet $
eg: ‘Internet $8.’
The seller can approve the bid by clicking on this button.
————
Once this is done, this bid will be listed under the bid history in both, the seller’s panel, and in the buyer’s side.
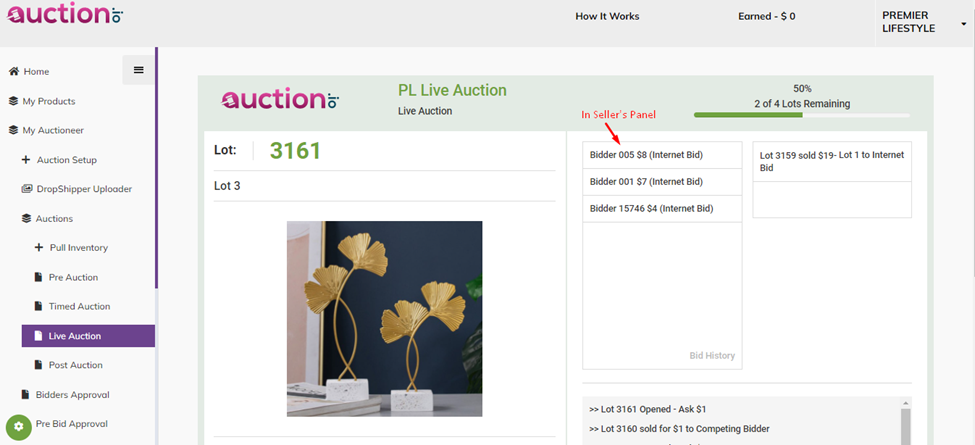
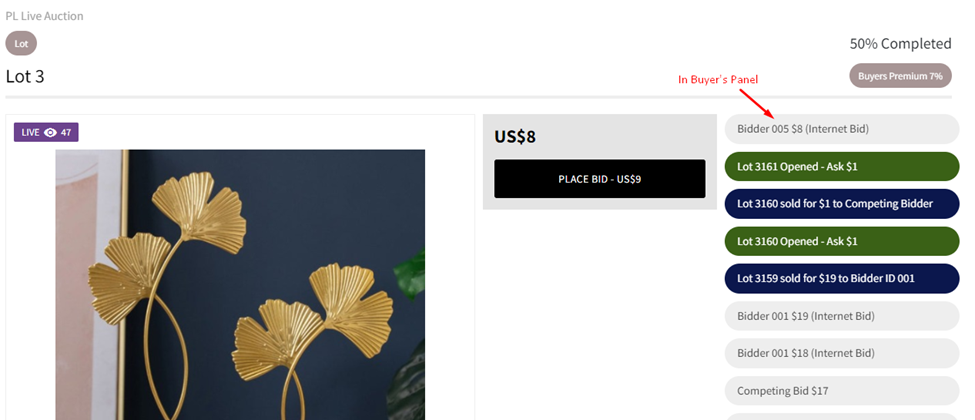
The seller can also add a competing bid from the seller’s panel by clicking on the button ‘Competing Bid’. This will be displayed in the bid history in both seller’s and buyer’s panel.

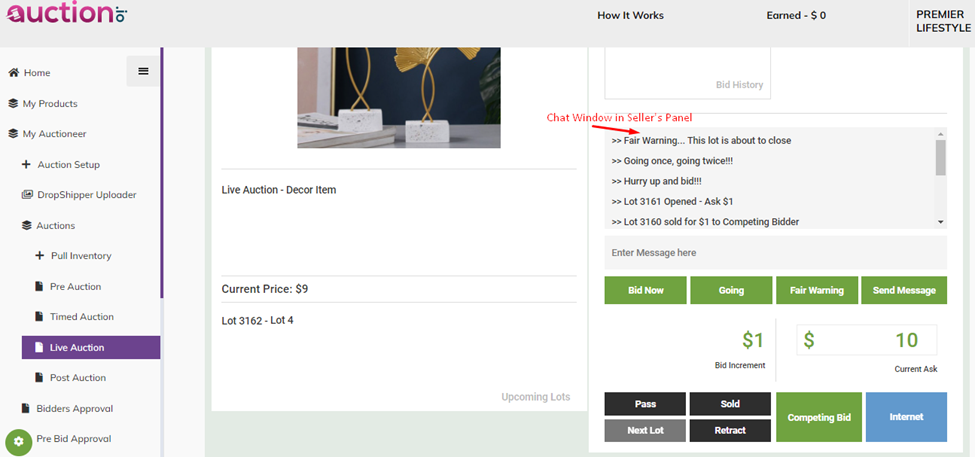
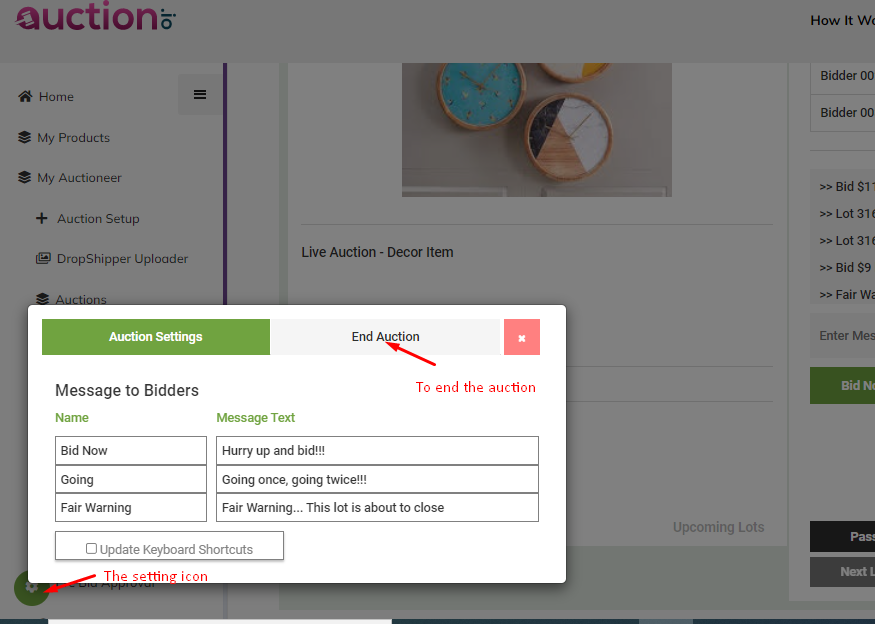
The seller can also send messages to his bidders from the seller’s panel.
The seller can use the predefined messages, or can enter custom messages by typing the text and clicking on the ‘Send Message’ button.
The predefined messages include:
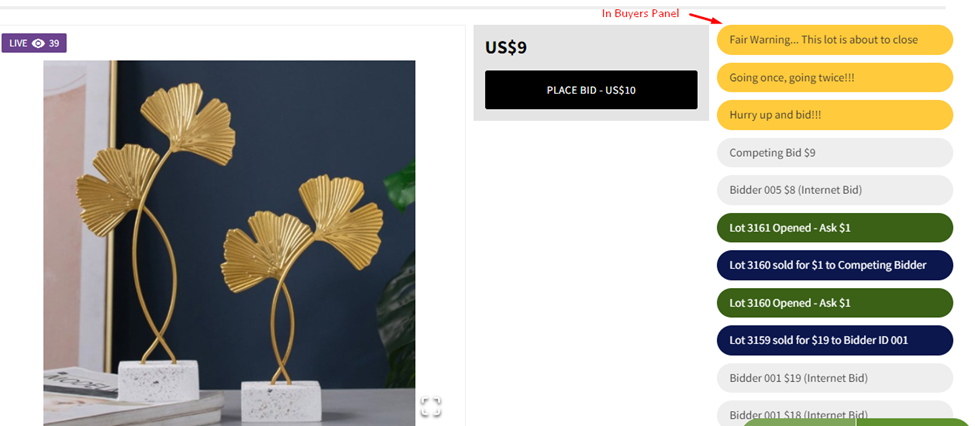
– ‘Bid Now’ button which sends the message “Hurry up and bid!!!”
– ‘Going’ button which sends the message “Going once, going twice!!!”
– ‘Fair Warning’ button which sends the message “Fair Warning… This lot is about to close”
All these messages are displayed in both sellers and buyers’ panels.
Once the seller clicks on ‘Pass’, then the message is sent saying that the “Lot
The seller can choose to cancel the last bid placed by clicking on the button ‘Retract’, and the message “Bid
The seller can close the sale by clicking on the ‘Sold’ button, and the message “Lot
eg: “Lot 3161 sold for $8 to Bidder ID 005”.
————
The seller can choose to end the auction anytime by:
Click on the setting icon – > ‘End Auction’
————
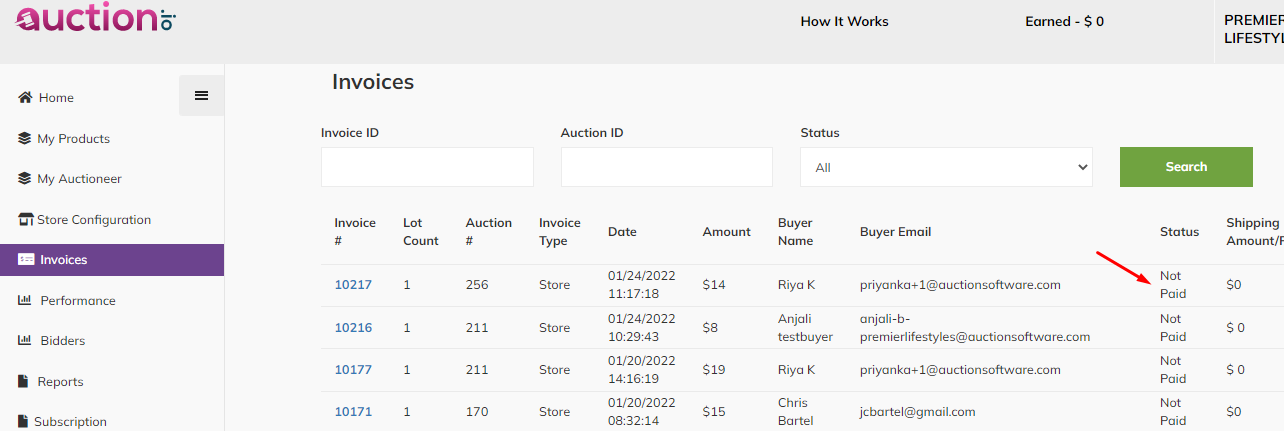
Once the lot is marked sold:
In the Seller’s panel, the invoice will be displayed as ‘Not Paid’
In the buyer’s Panel, the details will be displayed under ‘Bids Won’. He can then proceed to checkout from here.

After successful Payment:
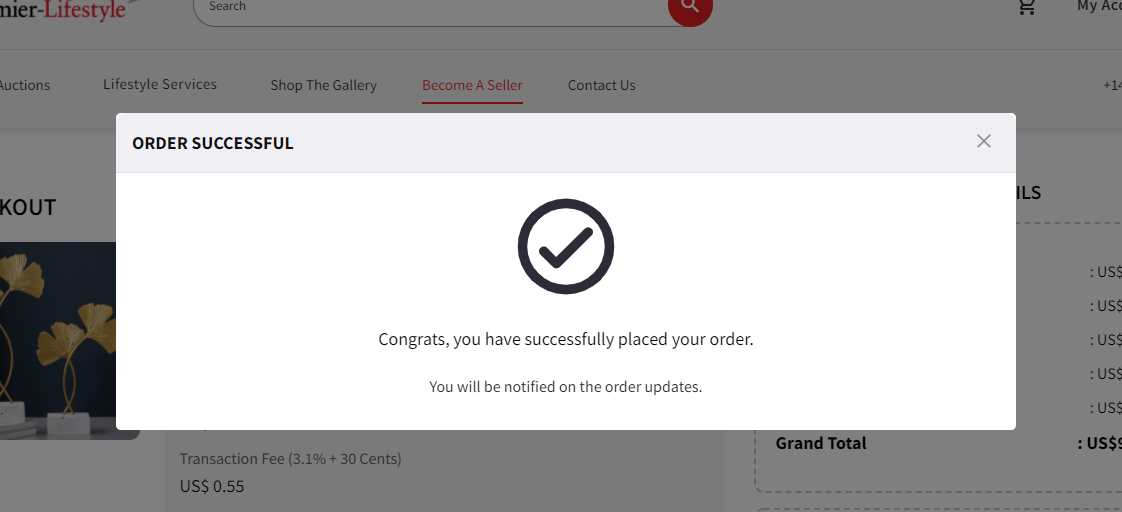
And the entry will be displayed as ‘Paid’ in the Seller’s panel.
